
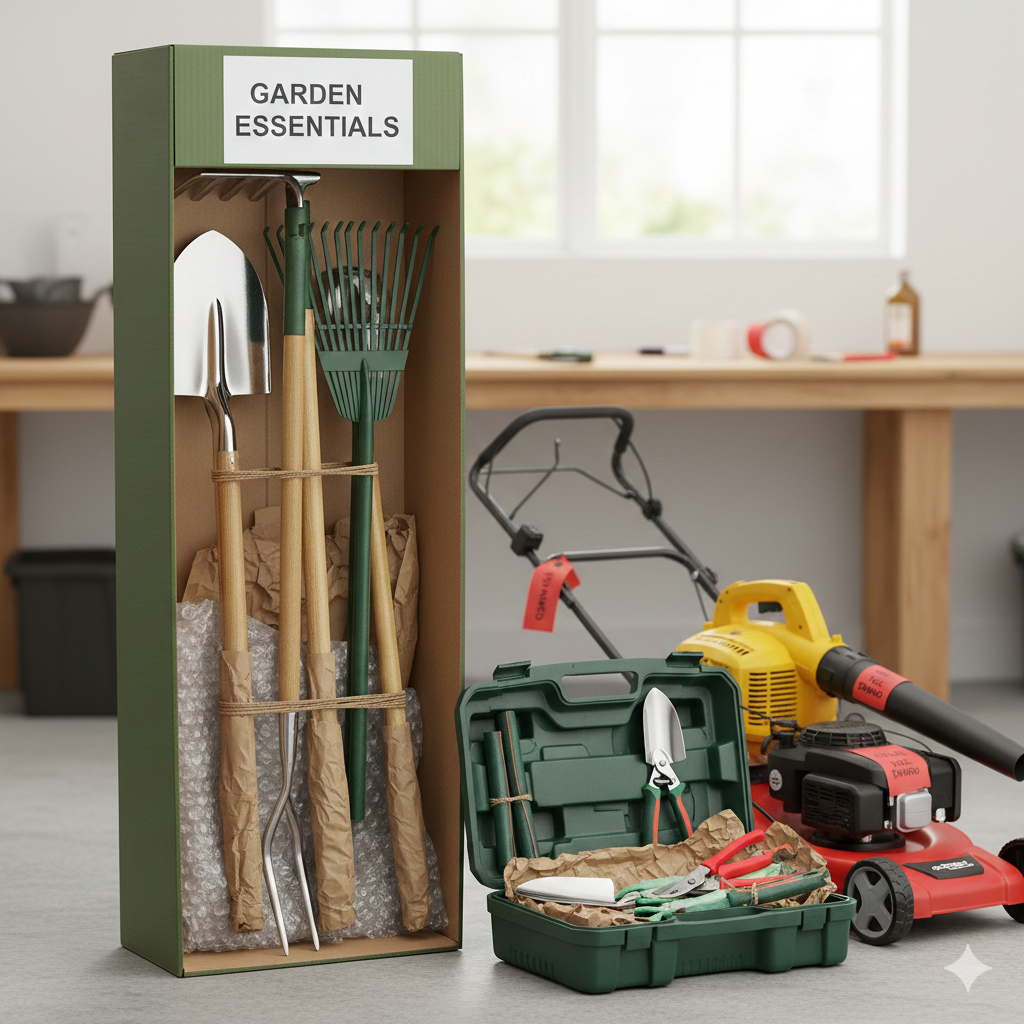
To pack garden tools for moving, follow this streamlined process: clean and dry all surfaces to prevent rust and soil-borne diseases; drain fuel and oil from power equipment to comply with safety regulations; bundle long-handled tools like shovels and rakes using zip ties or tape; and wrap sharp edges in bubble wrap or old towels. For transport, place long tools vertically in wardrobe boxes and secure small hand tools in padded toolboxes or sturdy small boxes.
I work with many pack garden tools for my projects. The right ones take care of the slow parts, like shaping, cutting, and small fixes. They let me focus more on doing the job well instead of spending long hours on small steps.
The “Pre-Move Audit”: Decluttering for ROI
Before you grab the packing tape, you need to conduct a tool audit. As an SEO and marketing expert, I look at moving as a “return on investment” (ROI) calculation. Heavy iron tools add significant weight to a moving truck, which translates directly into higher fuel costs and labor hours.
-
The Weight Factor: According to professional moving industry standards, every pound counts. If a shovel is rusted through or a rake has missing tines, it often costs more to move it than to replace it at your destination.
-
The Donation Hack: Instead of tossing “good but unneeded” tools, donate them to local community gardens or tool libraries. This reduces your load while providing a tax-deductible receipt.
-
Hazardous Materials: Note that professional movers are legally prohibited from carrying fertilizers, pesticides, and pressurized canisters. Plan to use these up or dispose of them at a local hazardous waste facility before moving day.
Phase 1: Preparation & Tool Sanitation
Cleanliness is more than just aesthetics; in the gardening world, it is about biosecurity. Moving dirty tools can inadvertently transport invasive species or soil pathogens (like Phytophthora) to your new property.
-
Remove Debris: Use a wire brush to scrape off caked-on mud and organic matter.
-
The Sterilization Step: Wipe down blades with a 10% bleach solution or 70% isopropyl alcohol to kill fungi and bacteria.
-
Rust Prevention: Once dry, apply a light coat of linseed oil or a lubricant like WD-40. This is crucial if your tools will be sitting in a humid moving container for several days.
Phase 2: Power Tool Safety & Compliance
Power tools require the most technical preparation. Failure to follow these steps can lead to safety hazards or a refusal by the moving company to load your equipment.
-
Drain All Fluids: Gas and oil must be drained from lawnmowers, leaf blowers, and chainsaws. Residual fumes are highly flammable in the confined space of a truck.
-
Battery Protocol: Lithium-ion batteries are sensitive to extreme temperatures. It is best to remove batteries from cordless tools and transport them in your personal vehicle or a climate-controlled “essentials” box.
-
Spark Plug Safety: Always disconnect the spark plug wire. This ensures the engine cannot accidentally kick-start if the mower blade is bumped during the move.
Phase 3: Packing Long-Handled Tools (Shovels, Rakes, Hoes)
Long tools are notoriously difficult to pack because of their awkward shape. The goal here is stability.
-
The Bundling Method: Group 3–5 tools of similar height. Secure them at the top and bottom of the handles using zip ties or heavy-duty tape.
-
The PVC Pipe Hack: For high-end pruning poles or sharp hoes, slide a section of foam pipe insulation (pool noodles) over the sharp ends.
-
Vertical Loading: Use wardrobe boxes. These are tall enough to accommodate most handles. Place the bundle into the box with the heavy heads at the bottom to lower the center of gravity and prevent the box from tipping.
-
Shock Absorption: Fill the gaps between tools with crumpled packing paper or old garden blankets to stop them from rattling.
Phase 4: Packing Hand Tools & Small Accessories
Hand tools like trowels, pruners, and shears are “high-risk” items for cuts during the unpacking process.
-
The “Nested” Approach: Use a dedicated toolbox or a heavy-duty plastic bin.
-
Blade Protection: Wrap each individual blade in bubble wrap with the bubbles facing outward. This prevents the bubbles from popping against the sharp metal and provides better cushioning.
-
The Towel Roll: For a set of hand tools, lay them on an old towel, roll it up tightly, and secure it with a bungee cord. This provides built-in padding and keeps the set together.
Phase 5: Labeling for Safety and Speed
Labeling is where many DIY movers fail. Effective labeling saves time and prevents injury.
-
Hazard Labeling: Any box containing sharp edges should be marked in RED with “SHARP OBJECTS” on all four sides.
-
Zone Labeling: Instead of just “Garage,” label boxes by their function, such as “Irrigation/Hoses” or “Pruning Gear.”
-
The “Day One” Box: Pack a small box with your gloves, a hand trowel, and a hose nozzle. This allows you to do light yard work at your new home without digging through twenty different crates.
Conclusion: Your Garden’s New Chapter
Relocating your garden tools safely requires a balance of mechanical preparation and organized packing. By sanitizing your equipment before the move, you ensure that no invasive pests or soil diseases are introduced to your new property. Proper bundling and vertical storage in wardrobe boxes minimize the risk of handle breakage and prevent tools from shifting during transit. Taking the time to drain power tools and secure sharp blades protects both your investment and the safety of your moving crew. Ultimately, a systematic approach ensures that your tools arrive ready to help your new garden thrive from day one.
Frequently Asked Questions (FAQs)
1. Can I move my lawnmower with gas still in the tank? No, most professional moving companies and rental agencies strictly prohibit the transport of flammable liquids due to fire safety regulations. You must completely drain all gasoline and oil from the engine and let it air out before loading it into a truck or container.
2. What is the best box for moving long-handled garden tools? A wardrobe box is the ideal choice because its height easily accommodates shovels, rakes, and hoes. If these are unavailable, you can create a “telescope box” by joining two large moving boxes together with heavy-duty tape to reach the necessary length.
3. How do I prevent my tools from rusting if they will be in storage for a while? Moisture is your biggest enemy during a move, so ensure every tool is bone-dry before packing. Apply a thin layer of multi-purpose oil (like WD-40) or linseed oil to all metal surfaces to create a protective barrier against oxidation while the tools are in transit.
4. Are there any garden items that movers won’t take? Yes, most movers will refuse to transport hazardous chemicals, including concentrated fertilizers, pesticides, herbicides, and pressurized canisters. Additionally, live plants are often restricted because they are fragile and can attract pests into the moving van.
5. Should I remove the handles from my tools to save space? Unless a tool is specifically designed to be disassembled, it is better to keep it together. Repeatedly removing screws or bolts can weaken the tool’s structural integrity; instead, focus on bundling similar tools together to create a stable, space-efficient unit.